
Ready to find your next great hire? Creating a job posting is where it all begins, and we've made the process about as painless as job-hunting-adjacent tasks get. Here's everything you need to know to get a job live in your Applicant Tracking System (ATS).
Step 1: Head to Your Dashboard
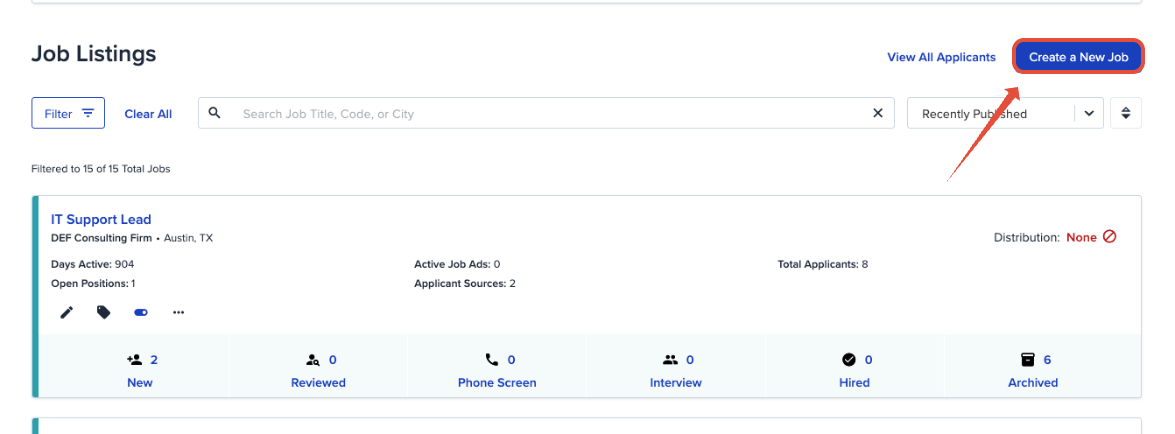
Log into your ATS account and go to your main Dashboard. From there, click Create a New Job and you're off.
Step 2: Fill in the Essentials
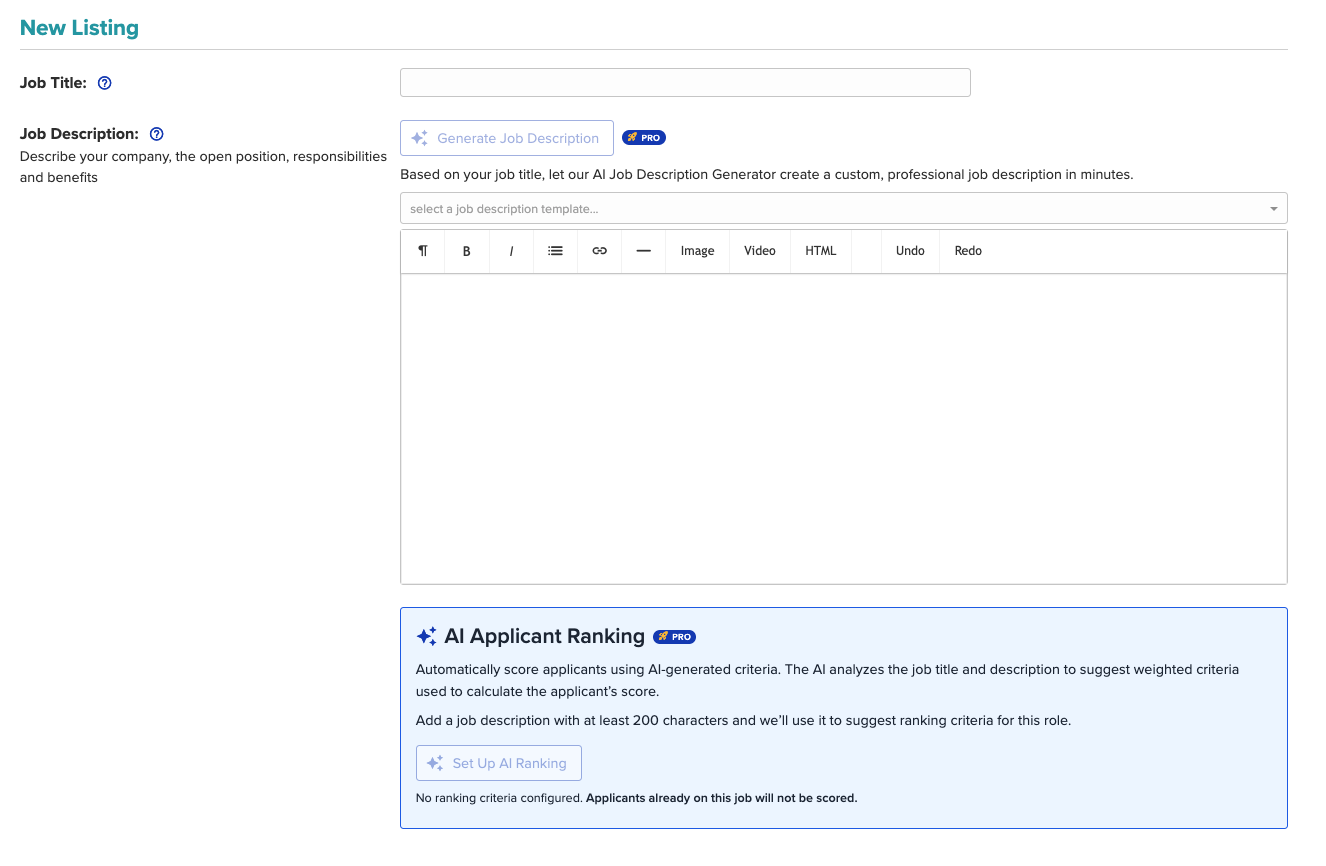
Next, you'll fill out the core details of your posting: job title, job description, and location.
Staring down a blank job description field? If you're on our Pro Plan, you can put it to work for you with our AI-powered Job Description Generator. It writes an original, high-quality draft in seconds, so you can skip the scramble for a template or the copy-paste-and-pray approach.
Pro also unlocks AI Applicant Ranking, which automatically surfaces your strongest applicants based on the criteria you set for the job, so you can spend less time scrolling and more time interviewing.
Step 3: Peek at the Advanced Options
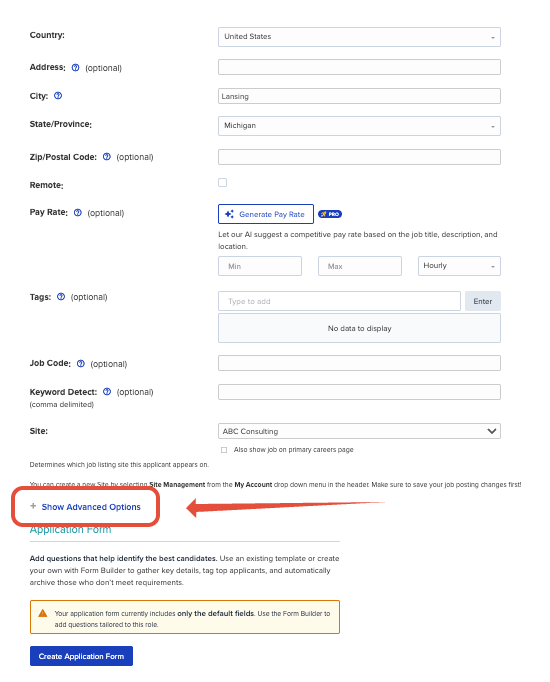
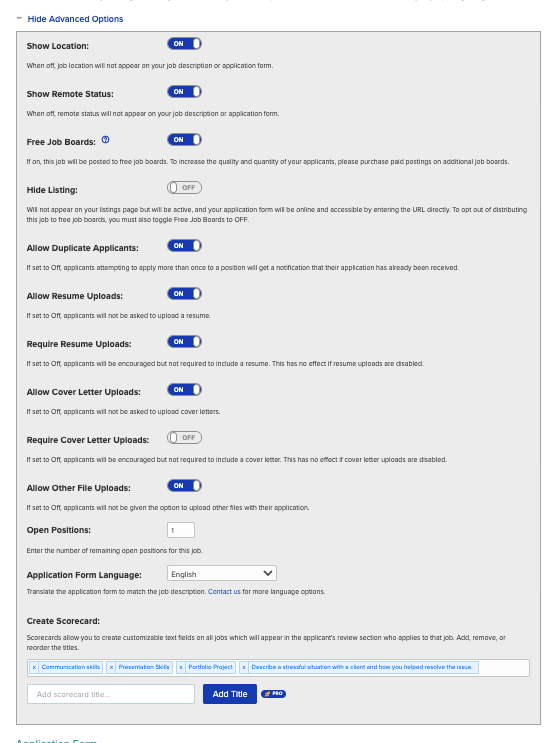
Want to fine-tune things further? Click Show Advanced Options to reveal a full set of additional settings you can use to tailor the posting to your company's needs.
Step 4: Set up Automations, Notifications, & Access
This step covers who gets access to the job and, if you're on our Pro Plan, which Automations kick in as applicants move through it.
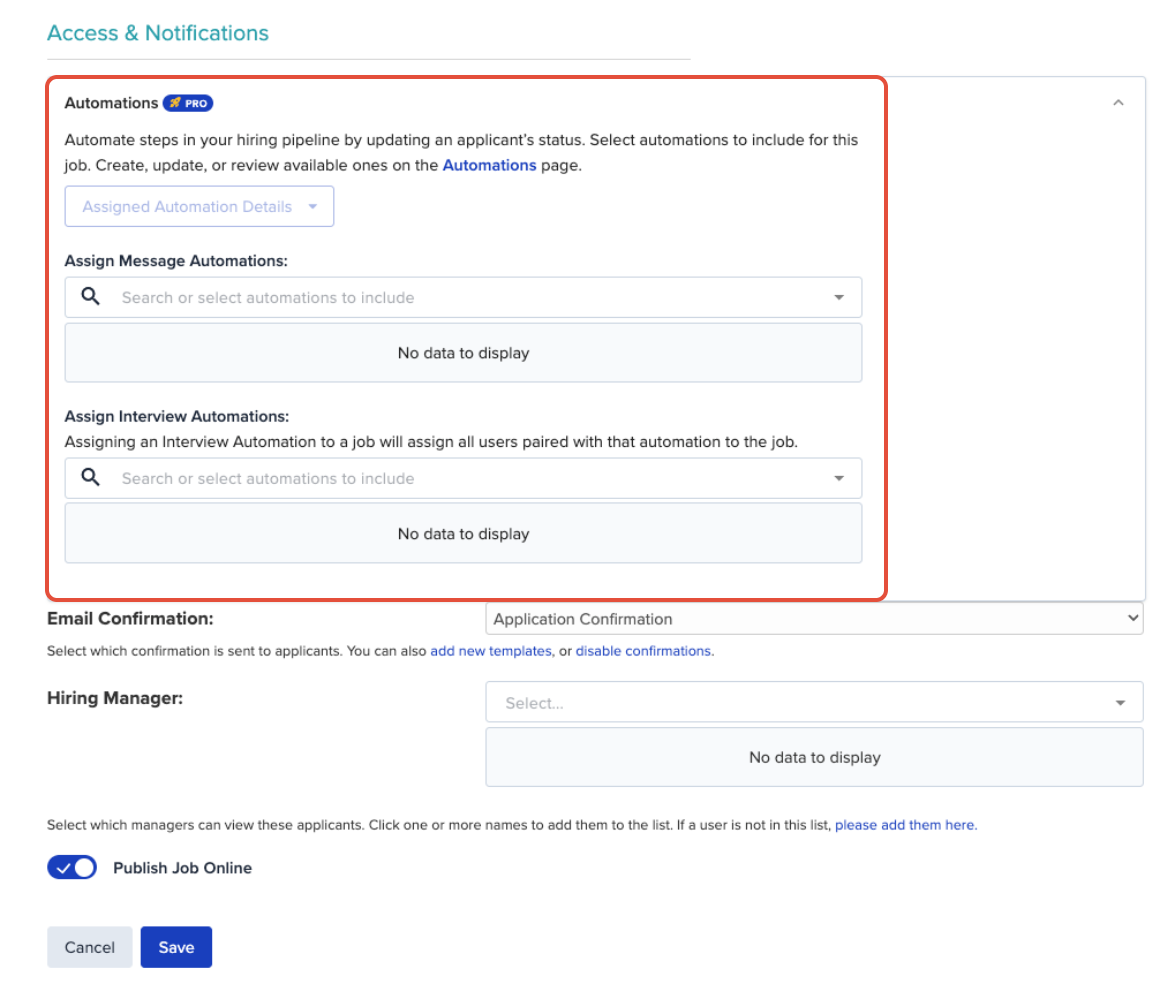
Assign your Automations (Pro Plan)
If you've set up Message or Interview Automations, this is where you assign them to the job. Automations are configured per job, so this step matters: if you don't assign an automation here, it will not fire when an applicant's status changes for this job, even if the automation exists elsewhere on your account.
If you're using Automations, don't skip this step. Learn more about setting up Message Automations and Interview Automations.
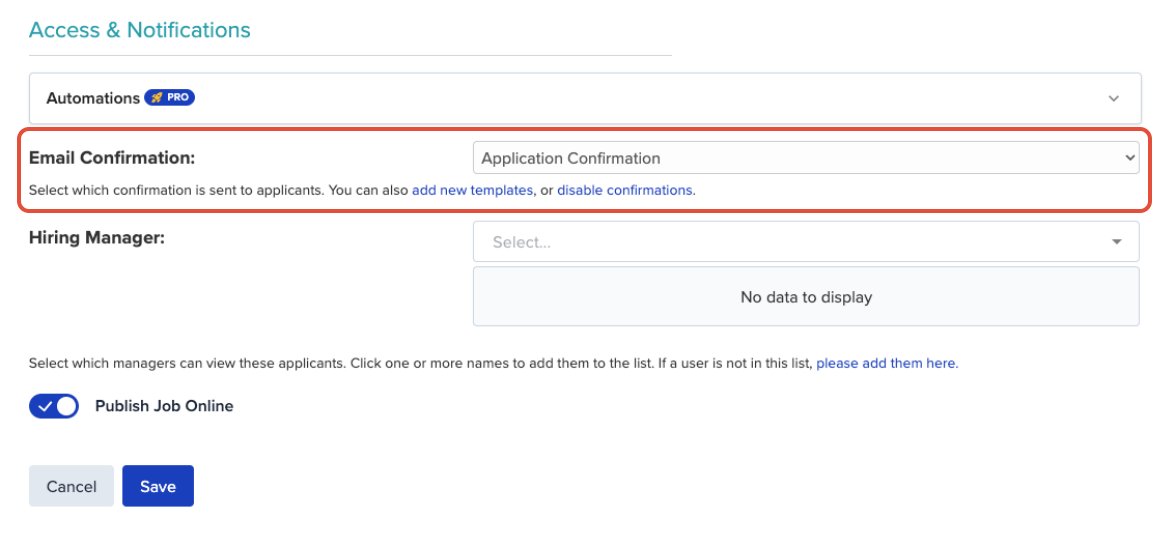
Confirm Your Application Confirmation
You can customize your Application Confirmation to your job as well, so if you've created one for this job, make sure you update it here.
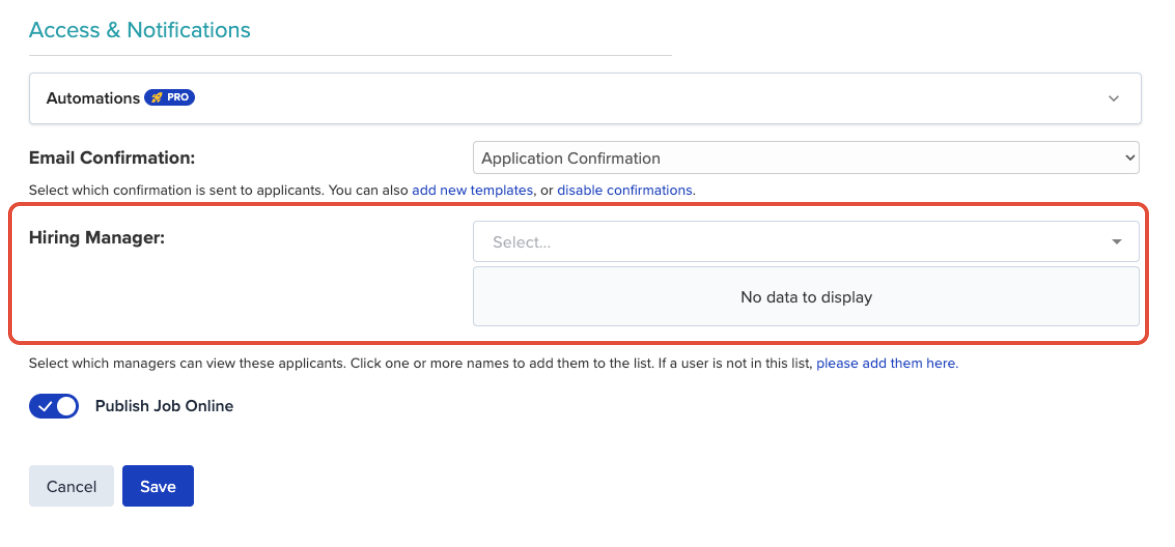
Assign a Hiring Manager
Every job needs someone steering the ship. The Hiring Manager oversees the recruitment process, manages candidate interactions, and evaluates applicants for the role.
A couple of things to know:
- You're automatically added as a Hiring Manager when you create a job, unless you remove yourself and assign someone else. If you leave this field blank, the Account Owner will be assigned to the job by default.
- To add more Hiring Managers, click the dropdown arrow on the Hiring Manager field and select as many users as you need.
- Each Hiring Manager gets access to the job posting and applicant details, though what they can actually do depends on their individual permission level.
Step 5: Publish (or Save it for Later)
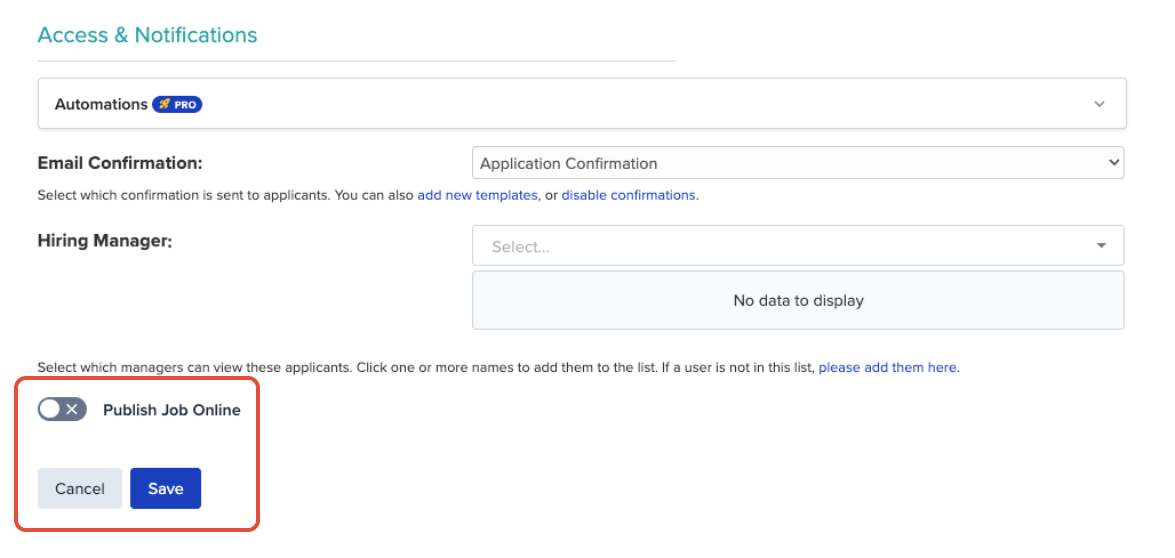
Reviewed everything and feeling good? Make sure you see a checkmark next to Publish Job Online before you click Save, and your job goes live on your careers page and is sent to Free Job Boards (unless you've disabled them under +Show Advanced Options).
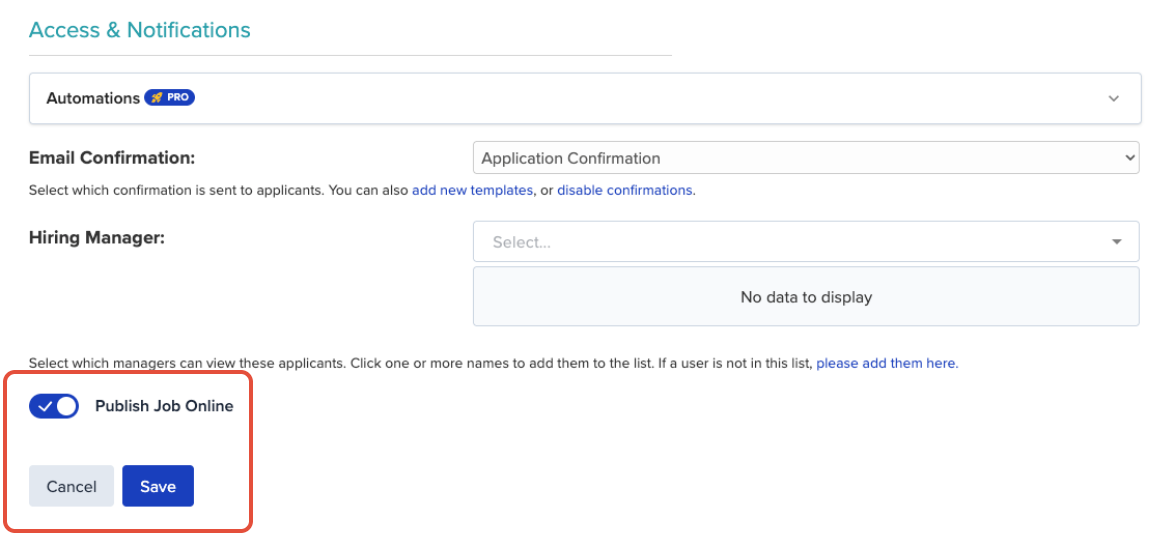
Not quite ready? Uncheck Publish Job Online before you click Save instead. Your posting will wait patiently in the Offline Jobs filter until you're ready to pick it back up.
Step 6: Consider Sponsoring your Listing
Want your posting in front of even more candidates? You can sponsor your job listing on various job boards. It's a paid option, but it can meaningfully widen your applicant pool if you're hiring for a hard-to-fill role.
That's it. Your job is live (or safely drafted), and you're one big step closer to finding the right person for the role.
A well-written, accurate posting tends to attract better-matched candidates, so it's worth revisiting your live jobs now and then to make sure everything's still current.
A closer look at some optional fields
A few fields on the job creation form are easy to skip past, but worth knowing about:
- Job Code: Entirely optional. Use it to tie your posting to an alphanumeric code for internal HR or recruiting tracking. It shows up on your Dashboard in condensed view and on your public job listing.
- Location Details (City, State, Country): These pinpoint where the job is actually based, which matters if your company's headquarters and the role itself are in different places. For remote roles, check the Remote box, but still enter a real location. Job board partners require a legitimate location to index the listing properly, even if it's Remote.
- Keyword Detection: Add a comma-separated list of keywords relevant to the role (say, JavaScript, Ruby for a developer position), and our analysis engine scans incoming resumes for matches, tagging applicant profiles accordingly. A nice head start when you're sorting through a stack of applications.
- Hide Listing: Want the job posted to job board partners but not shown on your own job listings page? This option makes that possible. You can change your mind and edit this setting any time. Read more about hiding a job here.
- Form Builder: Add custom application questions, automatically archive applicants based on their answers, and more. See the full Form Builder guide here.
That covers everything you need to create a job posting from start to finish. If anything's unclear or you run into a snag along the way, our support team is happy to help. Reach out any time.
